
Hi Gang…
As I’ve mentioned before, I feel like one of the luckiest “car guys” around.
I’ve always been fascinated with corners of the world that are “less traveled.” This has taken me on some of the most amazing journeys where I’ve met some fascinating and creative people. Robert Cumberford is one of those folks that I’ve met on this path, and am honored to call “friend.” And… non-withstanding the topic for today’s story – perhaps “friend of fiberglass” too.
In the past several years, Robert has been kind enough to share with us his perspective on fiberglass and design – and his memories of some great folks and cars too (click here to review Robert’s memories of the Dyna-Panhard fiberglass car designed by Darrin and the cover of Road & Track that featured the car). Last year, I had a chance to meet Robert along with his friend Stan Mott at the 2012 Amelia Island Concours d’Elegance, and I’m honored to still be in touch with both of them via e-mail today. (Click here for a profile of Robert that appeared in Automobile Magazine in April, 2011).
Today’s article is a look back in time. Back to 1962 where a then 26 or so year old Robert Cumberford shared with the readers of Car and Driver his thoughts on building his own fiberglass bodied sports car. This article was not based on research alone for Robert had toiled in ‘glass more than once, so his thoughts and feelings – and humor – came from his shared experience.
And….what makes this article even more important is that it’s a retrospective completed about 10 years after fiberglass bodied sports cars first appeared at the November, 1951 Petersen Motorama. So it’s our first analysis article of what happened with fiberglass – and why – in the 1950s.
Let’s have a look at the article and return to 1962…some 51 years ago today.
Take it away Robert

At The Amelia Island Concours d’Elegance (2012). From Left to Right: Robert Cumberford, Stan Mott, Geoff Hacker, & Rick D’Louhy.
Don’t Build That Fiberglass Body!
Car and Driver, September 1962
By Robert Cumberford
Want To Build A Fiberglass Body For Fun And Profit?
Stop. You Just Can’t Do It. Satisfaction, Yes; But Fun, No.
There are only two valid reasons for building your own body of fiberglass: to obtain unique style and for sake of your pride. The latter is the key to most special-building: some people wouldn’t be happy with a Ferrari, simply because someone else built it. Whatever your reason, it had better be unshakable. Otherwise, the magnitude of the project will overwhelm you before you finish and you’ll have joined the ever-growing throng of enthusiasts who have started to build a fiberglass body and have never finished it.
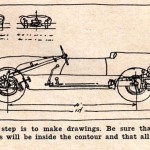
Are you discouraged? Good. Then we’ll go on. Perhaps you don’t care now, so we can be frank about the whole exhausting business. The first step is to make drawings. Sure, many fiberglass bodies have been made without them – but they look it. Drawing is the best way to develop those good lines you want. If you’re not trained in lofting, find a collaborator who is or study books on naval architecture at the library. Making every line “fair,” making all views correspond, and making sections through the form require a great deal of accuracy, so take your time. You may be lucky enough to lose interest.
A small-scale model will allow you to “see” the whole car and take templates anywhere. If the model is made of good-quality, oil-based, non-drying clay, it will hold a shape as long as you want, yet it can be changed quickly, unlike soft wood. Whatever material you use, don’t make your model much less than a foot over-all. It is hard to scale-up small templates, and details are hard to incorporate. The problem of pulling molds off the master form and pulling skins out of the molds will determine parting planes and the car’s shape. Ask your wife, mother, or home economics teacher about draft angles. She’ll know which kinds of molds you can get food out of and which you can’t.
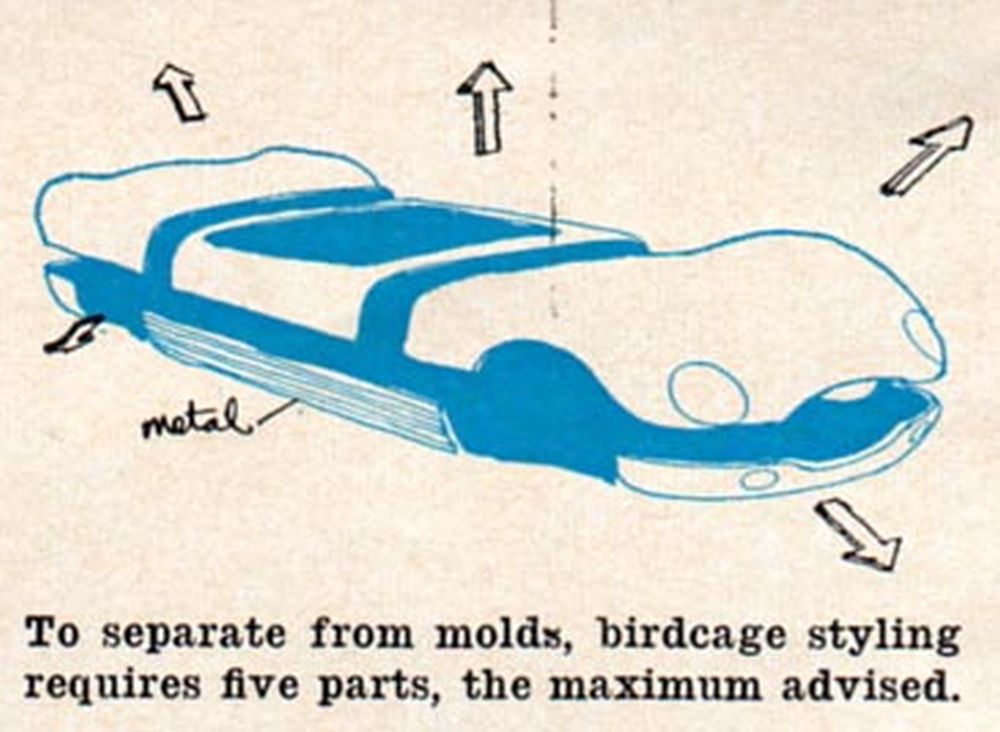
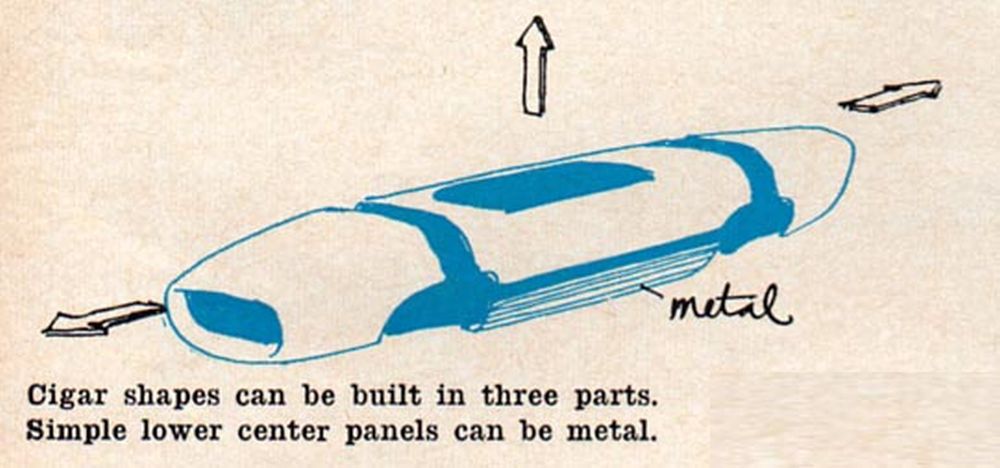
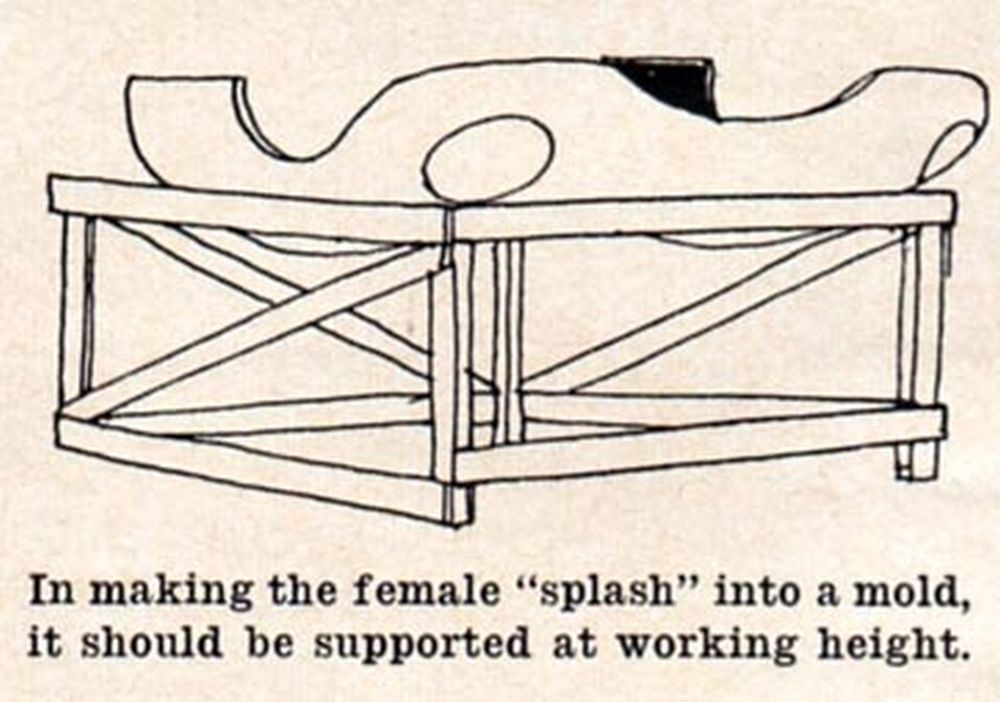
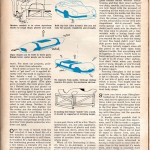
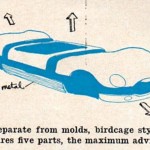
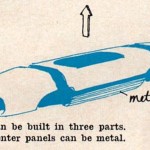
Or study automotive parts catalogues which show body panels in exploded views. Stamped steel parts all have draft angles so that they will come out of their dies easily, and whatever is possible in sheet metal is possible in fiberglass. Ideally, you would make only one mold, but if you pulled everything in one direction, your car would look – let’s be kind – odd, like a Victorian bathtub, or an old Nash. And it wouldn’t be as strong as it could be. On the other hand, you don’t want a car made of as many pieces as an Avanti. Fiberglass is at its best in large panels, so try to design your body so that you can pull it out of no more than five molds. Study the sketches to see how the number of molds affects the shapes permitted.
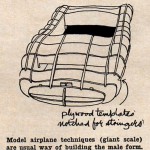
For strength with lightness, use plenty of shape in the surfaces. An example of a production car that would be strong in fiberglass is the highly convoluted 1959 Chevrolet; conversely, the nearly square, flat shapes of the current Chevy II are wrong for fiberglass. So keep your drafts and joints simple, but curve the surfaces in all planes all the time. Once you have your design worked out you’ll be ready to build your master bodyform, a male mold variously known as a plug, buck, or male die. It amounts to a full-scale version of the model you made before.
What about material? Clay is expensive and cannot be used directly for making fiberglass lay-ups; good, dry, clear-grained, warp-free wood is not cheap either, and working it takes a long time and much equipment. Alas, that leaves us with plaster-cheap, readily available, nasty plaster of Paris. (Break out the respirators and the hand cream, men, we’re going to get silicosis pour le sport.) Work in a large workspace so you can get far enough away from your masterpiece to see what it really looks like. You’ll make plenty of mistakes, no doubt (even the professionals do), and you’ll want to correct them before you take your car out into the light of day.
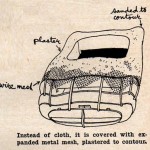
Also have a supply of running water, plenty of ventilation, good light and adequate fire protection. Glass fibers won’t burn, but the plastic they reinforce will. Of course, you don’t just mix up a 1,000-pound lump of plaster and carve it to shape. You must have the shape first. The quickest cheap way is to make up a bulkhead-and-stringer frame (a lot like an old fashioned model airplane’s), letting the formers come to a point about one-sixteenth of an inch from the final surface. The area between formers should be filled with wire lath, over which a coarse basecoat of plaster will be laid. It’s called a scratch coat-you’ll find out why when you do yours.
The final coat of plaster should be quite thin and smoothed down as closely as possible to the desired final surface. Lumps of dried plaster take a lot of sanding to remove. Finishing the plaster is not an overnight job. It is dusty, dirty, tiring, and boring work. Unless your friends are trueblue and super-stalwart, you’ll work – alone – a long time on this stage of the project. Even offers of free beer and coffee won’t help much, though you can be sure that the beer will be consumed. When the plaster bodyform is completely free of imperfections, it should be allowed to dry for a week to ten days at a constant temperature, after which it must be sealed with ordinary body primer surfacer, and wet-sanded to a high gloss finish. Only now will you be ready to think about-oh, joy! – the actual fiberglass.
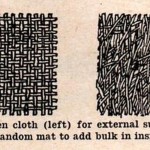
Fiberglass” here stands for fiber-glass-reinforced plastic, a complex structural material made up of two or three kinds of plastics reinforced with glass filaments. Mixing these delicate, touchy materials is not to be approached casually. Ask your friendly neighborhood fiberglass- and-plastics salesman for some technical advice, then follow it–exactly. (You might buy your materials at the same time and save carfare.) There are several glass-fiber materials to consider. The glass will be offered to you as chopped strand (which you don’t want), woven roving (fine for molds, but not for lightweight bodies), mat (in various weights and thicknesses), and cloth (generally a straight warp-and-woof weave, in weights ranging from a shimmering, gossamer tissue to quite heavy “canvas”).
Fiberglass cloth tape is available in various widths (it is useful for edge-bindings and patches). Try to get advice on weights to use and ask to see sample laminates made from the material recommended. Remember that fiberglass is heavy (glass weighs about 165 pounds per cubic foot), and you are trying for lightness. Use the Corvette’s 1/10 inch panel thickness as a very high maximum. Fiberglass bodies are light only because thicknesses are held down wherever possible. A fiberglass body- particularly a first attempt-is likely to weigh more than an aluminum shell. If you’re not pretty careful, it can weigh more than an equally strong steel body shell.
The glass material will have to be tailored to the buck before you do any work with plastic. Ordinary scissors will cut any weight of fiberglass you’re apt to use. Wear gloves to avoid getting your hands full of invisible glass “hairs” which itch like the devil, and if you want to play it really safe, wear a face mask; itching lungs are no more pleasant than itching thumbs. Remember to mark each piece of cloth or mat as you cut it, and remember which side goes up. This will be vitally important when you’re laminating. There are two families of laminating resins, the epoxies and the polyesters. Epoxy resin is stronger, lighter, and fireproof, but it costs more. For most car projects, polyester is more than adequate.
You’ll need at least two blends of resin: a “gel coat”- it is applied directly over the mold to capture surface details – and a “laminating resin”-used for strength by building up layers of glass. (The glass gives strength, the resin gives rigidity.) Before you put any plastic on the mold, though, it must be coated with a parting agent to prevent permanent bonding of the plaster and the plastic.
The usual parting agent has to be thinned with alcohol (no, beer won’t do) and, as you know, alcohol is not cheap. Neither is the parting agent, for that matter, nor the resins, nor the catalysts for the resins. Measure everything with a balance scale or in graduated glass containers. Don’t waste a drop. You’ll save money and perhaps avoid a fire. And don’t mix plastic unless the windows are open.
Once the resin is mixed with the catalyst, it has a fixed life of a few minutes, so you’ll have to work fast while its plasticity is still there. It wouldn’t be a bad idea to rehearse the laminating process without resin a few times – a literally dry run. If you happen to have a paintbrush in the resin pot when it sets up, that’s that. It’s interesting to watch it become an unbreakable mass, but it’s also expensive. A lot of heat is generated at the moment of solidification, and if too much plastic mass is in one spot, there will be a fire. That’s spectacular, too, but also expensive.
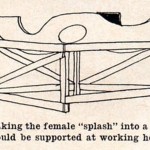
After each layer or plastic and cloth has been put down, allow the laminate to cure for whatever time your expert has advised. Too-hasty application of another layer can ruin the whole piece. When all the laminating is done, it’s time to de-laminate, a process which will be delightfully easy if you have calculated your draft angles properly and remembered to put enough parting agent on the mold, and devilishly hard if you haven’t. Let’s be optimistic and assume that you manage to pull off all the fiberglass female molds without undue trauma, and that their inner surface are clean, smooth, and accurate. You are now faced with the prospect or repeating all the work you have just done to make the molds, but this time inside out. Cheering, isn’t it?
And since the pieces you’re making now are the actual skins of your very own magnificent did-it-yourself body, extra-special care is in order. No doubt you’ll reach into the depths of the nose cone to smooth out a tiny wrinkle with a loving hand- and glue yourself to the body. Ah, well, you wanted the car to bear the stamp of your fine hand, didn’t you? And skin grows back fairly quickly. You may naively expect, since all the pieces of the body came from adjacent molds, that everything will fit together. It won’t. You’ll have to twist and pull and warp each section to get it to fit every other section. Just don’t twist when you should pull or warp, though, or you’ll crack the skins and be faced with the need to make repairs.
Painting fiberglass is not as easy as painting metal. The cloth texture is apt to obtrude, and the only cure is to use lots of putty and primer which is heavy. You might find the local Corvette experts a bit more willing to tackle the paint job than most body shops. So now you have your fiberglass bodied car. It has taken a year or two, and you’ve spent just about ten times what you would have had you bought a ready-made fiberglass body in the first place. True, you’ve got a lot of hard-won experience in working with fiberglass, but the question is: was it worth it?
It hardly seems possible that it was. I’ve been through this experience, and I’d like to make a suggestion. If you have a passionate longing for a body made of fiberglass, buy one ready-made. There are at least 30 types to choose from, and you ought to be able to find something you like among them. If, on the other hand, you are more interested in having a body built to your own designs than in the material it’s made from, don’t make it yourself-hire Pininfarina or Vignale or Ghia or Fantuzzi. Anyone of them will build a superbly finished, trimmed and painted body on your chassis cheaper than you can in fiberglass-and far better than you can hope to.
Summary:
What an excellent article on the challenges of both designing and building your own fiberglass bodied sports car. In part 2 of the article, Robert was kind enough to give us his thoughts on the article nearly 50 years after he wrote it. So stay tuned gang…same bat time…same bat channel and your favorite place for vintage ‘glass stories….Forgotten Fiberglass.
Hope you enjoyed the story, and until next time…
Glass on gang…
Geoff
——————————————————————–
Click on the Images Below to View Larger Pictures
——————————————————————-


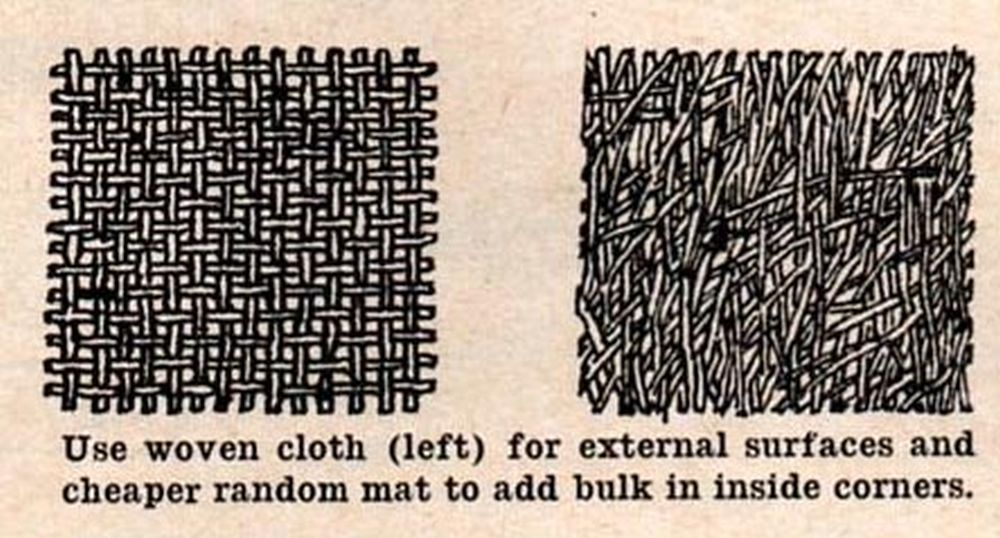
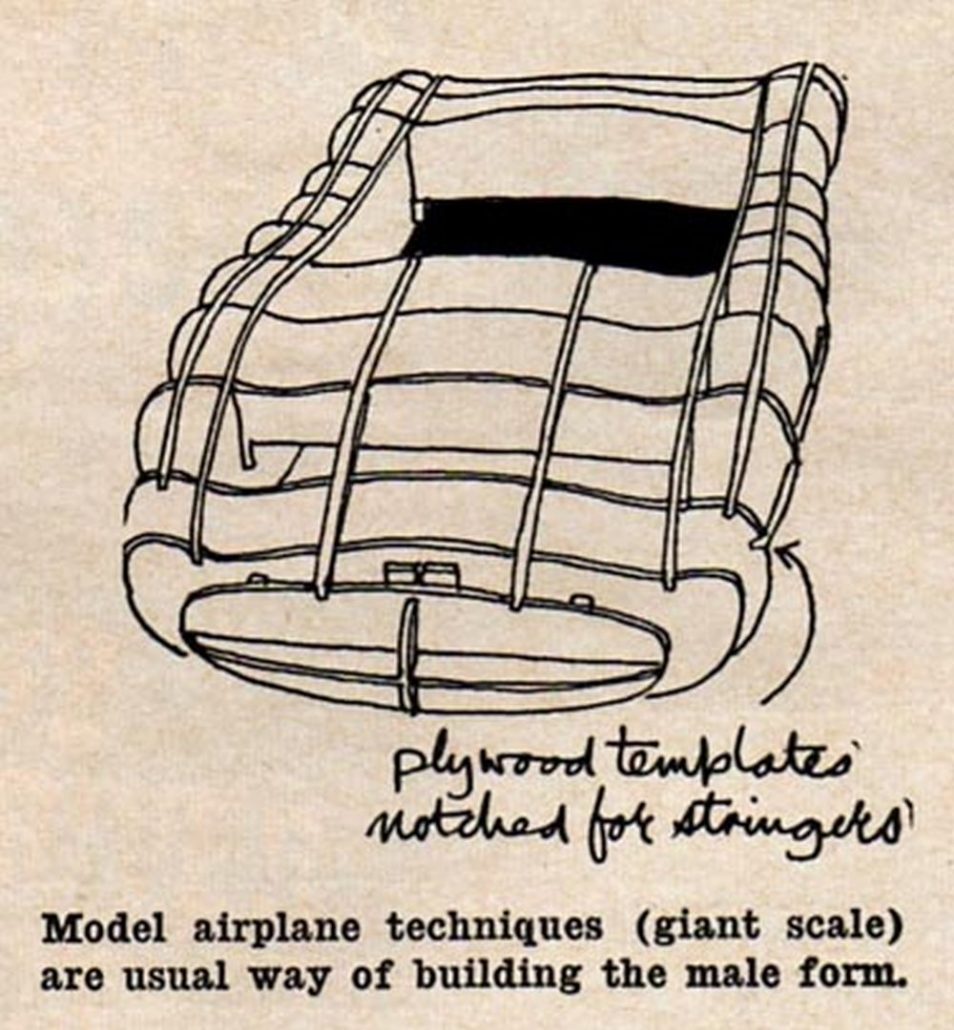
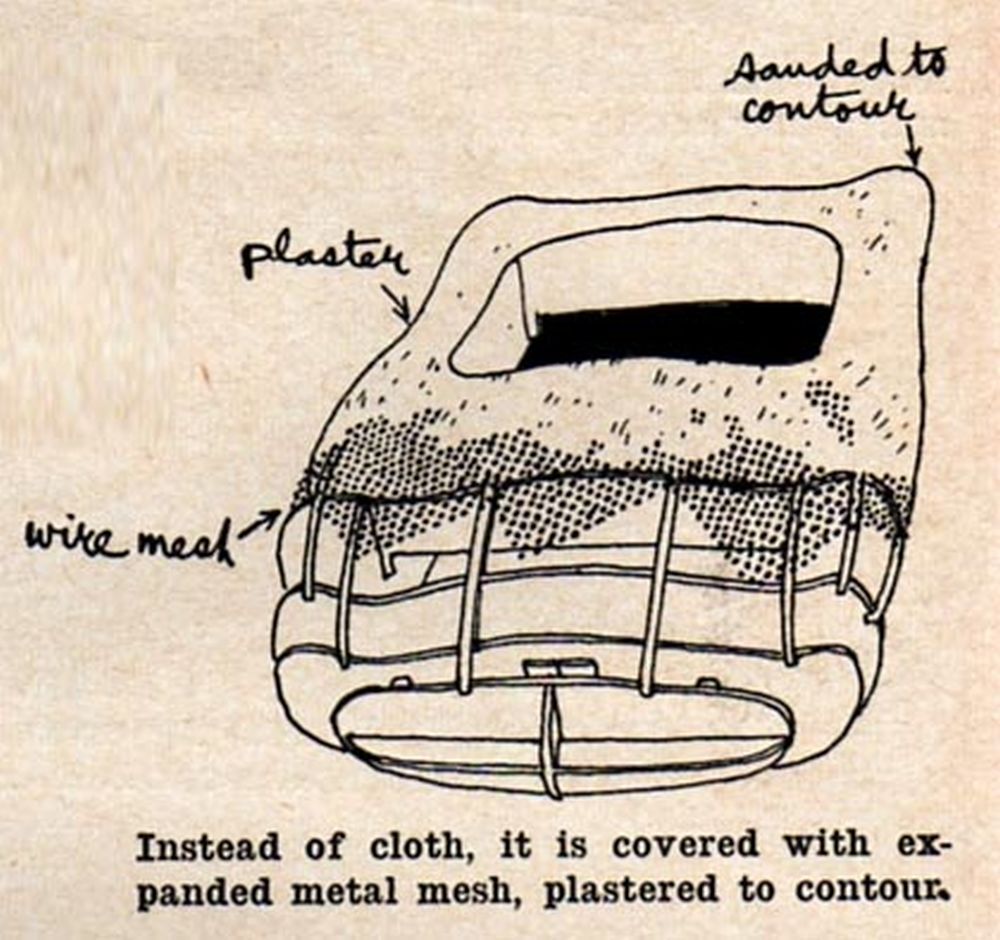
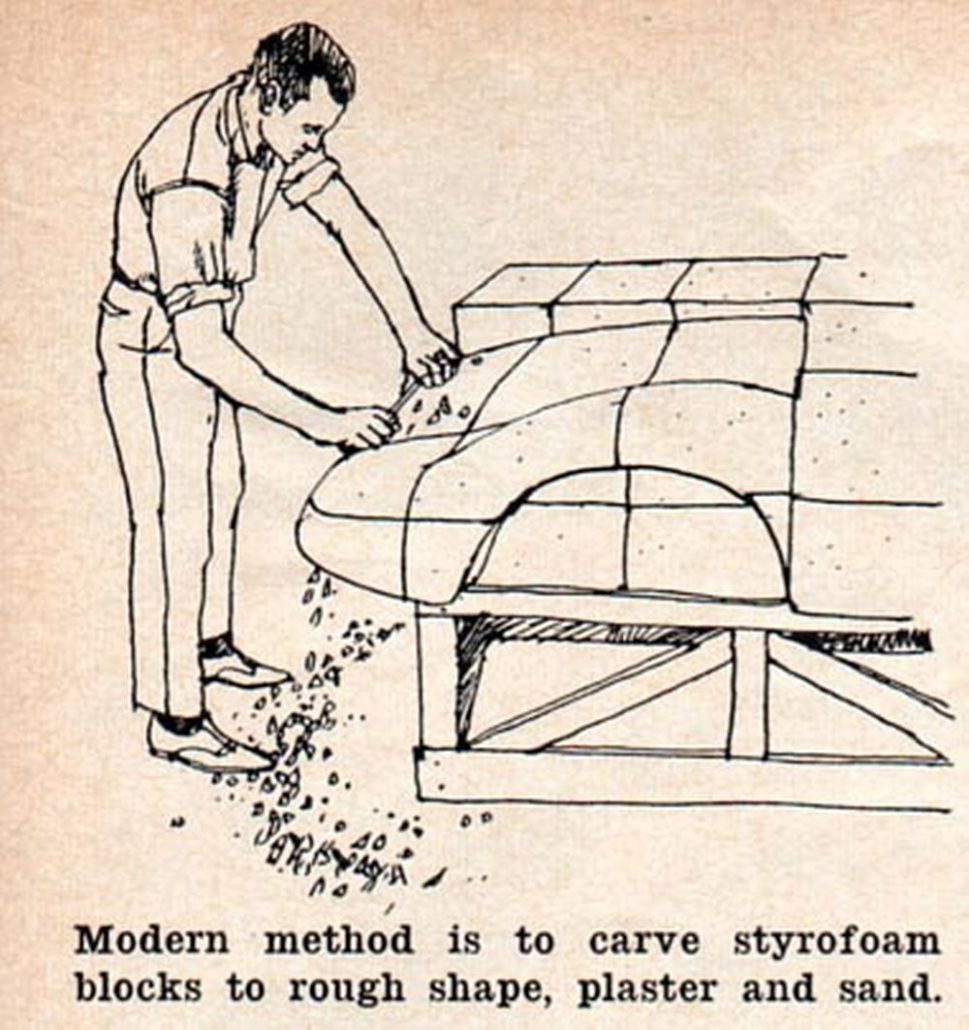





Love this article, it makes me think of my Hero Bill Tritt building three car designs and I don’t know how many boats. Bill told me he built the cars on weekends because his company only wanted to build boats, thats passion !
So nice of you to think of dad in regards to this… The same the same thoughts came to me, as well. All the best, greg
Geoff
Thanks for all you do on Forgotten Fiberglass..Great article .Been there done that.so true about most efforts not being finished..It’s neat to see all the old designs popping up after so many years of gathering dust in all the barns around the country..
Mel Keys
This is a profoundly important article, as are most of the stories that Robert Cumberford’s fingerprints are on. I’ve never met the man (although I hope to some day), but still I feel as though I know him through his prolific writings on things automotive, and mostly for his inherent honesty about his deeply held convictions.
As a 15 year old kid, when I was dreaming about building my own sports car after seeing the February, 1957 issue of Road & Track with the Byers SR-100 on the cover, fortunately it never occured to me to actually build my own fiberglass body to my own design. The Byers was pretty close for me and after John Bond declared it as “the world’s most beautiful sports car”, that was enough to start the letters to Jim Byers which resulted in the arrival of the Byers body in 1958. Subsequently it was finished in 1960, 2 years before Robert’s comprehensive (and honest) article appeared in the September, 1962 Car and Driver.
Sometimes, not knowing all there is to know at the beginning of a project can be a very good thing!
~ most definitely, Rollie. the word ‘honest(ly)’ stands out. no punches pulled, while keeping the signature humor and real-world perspective.
~ Martinique, Cyclops, Dean’s Garage, Forgotten Fiberglass, Dr. RPM ? have i died and gone to Field of Dreams?